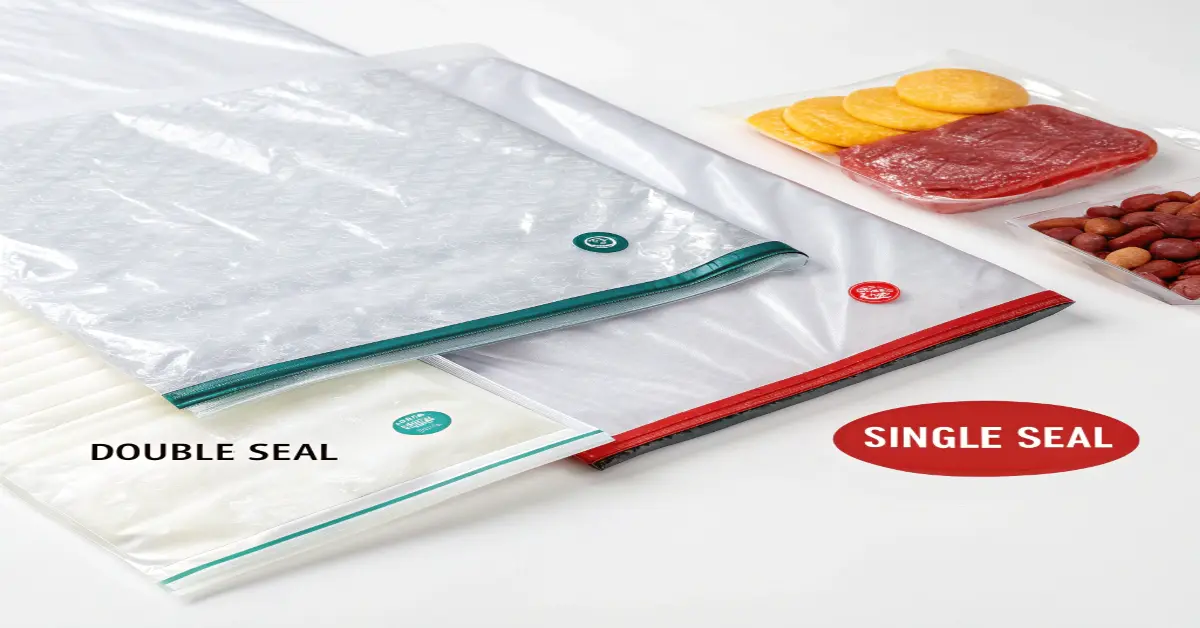
If you’ve ever wondered, “Should you double seal vacuum bags?” the answer depends on your storage needs.
Quick Answer: Yes, double-sealing vacuum bags are highly recommended, especially for long-term storage, sous vide cooking, and when storing valuable or liquid-rich foods. The second seal provides added protection against leaks and ensures better preservation.
One thing that I learned on that day was to double-seal the vacuum bags and that is not just a choice but a must most of the time. Here, I present you with my own experience and my professional take on the importance of that extra storage step!
The Real Story Behind Double Sealing: My Journey
When I first started vacuum sealing, I was skeptical about double sealing. Isn’t one seal enough?
I thought. But after a disappointing incident where a bag of expensive ribeye steaks leaked in my freezer, I learned my lesson the hard way.
Here’s what changed my mind: I found that double sealing creates a backup safety measure, kind of like having an insurance policy for your food. Through trial and error, I’ve discovered that certain situations demand this extra step.
Why I Always Double Seal (And Why You Might Want To)
Let me tell you something interesting – not every bag needs a double seal, but when you’re dealing with:
- Expensive cuts of meat (learned this after my ribeye incident)
- Liquid-heavy marinades
- Long-term freezer storage
- Sous vide cooking preparations
The extra 30 seconds it takes to make a second seal can save you hours of cleanup and prevent food waste.
The Science Behind Vacuum Sealing: What Happens?
Here’s what I’ve learned from my research and conversations with food science experts: When you vacuum seal a bag, you’re removing air that could potentially harbor bacteria and cause freezer burn.
The sealing process melts the plastic layers together, creating a barrier. But here’s the kicker – even a tiny imperfection in that seal (maybe from a piece of food or moisture) can compromise everything.
“Think of double sealing as wearing both a belt and suspenders – it might seem like overkill until your pants start slipping!” – My old culinary instructor used to say
Common Mistakes I’ve Made (So You Don’t Have To)
Trust me, I’ve made every vacuum sealing mistake possible. Here are the big ones:
- Overfilling bags (rookie mistake!)
- Forgetting to wipe the sealing area
- Rushing the process
- Using cheap, thin bags
Each of these mistakes taught me something valuable about the process.
My Tested Methods for Different Foods
| Food Type | Sealing Method | Extra Tips |
| Fresh Meats | Double seal + 1″ spacing | Wipe edges thoroughly |
| Soups/Sauces | Freeze first, double seal | Leave extra headspace |
| Vegetables | The single seal is usually sufficient | Pat dry before sealing |
| Dry Goods | The single seal works fine | Add oxygen absorber |

The Sous Vide Connection: Why Double Sealing Matters
Let me share a quick story: I once attempted a 48-hour sous vide brisket with a single seal. Twenty hours in, water started seeping in. Since then, I’ve never skipped the double seal for sous vide. Here’s why:
- Extended cooking times stress the seals
- Water pressure can find weak points
- Temperature fluctuations affect seal integrity
Choosing Your Bags: What I’ve Learned About Quality
After trying dozens of brands, I’ve found that not all vacuum bags are created equal. The cheap ones? They’ve cost me more in wasted food than I ever saved on the bags. Look for:
- Thick, textured material
- Clear “channel” patterns
- Proper size options
- BPA-free certification
Troubleshooting Tips From My Kitchen to Yours
When things go wrong (and they will), here’s what works for me:
- Clean sealing area with vinegar solution
- Let sealer cool between uses
- Check for wrinkles before sealing
- Use paper towel barriers for moist foods
The Long-Term Storage Game Plan
Here’s my time-tested strategy for maximum storage life:
- Double-seal anything going into the freezer for over a month
- Label everything with the date AND contents
- Use appropriate storage temperatures
- Organize by expiration date
Cost Analysis: Is Double Sealing Worth It?
Let’s break down the real costs:
- Extra bag length: about 1/4 inch per seal
- Additional time: 30 seconds
- Peace of mind: priceless
Compare this to losing a $30 roast to freezer burn, and the math becomes pretty clear.
My Best Tips for Perfect Seals Every Time
After thousands of bags are sealed, here’s what works:
- Clean edges with an alcohol wipe
- Wait 5 seconds between seals
- Check seal clarity – should be clear, not cloudy
- Test seals by gentle pulling
FAQs
Q: How far apart should double seals be?
A: I keep mine about 1/4 inch apart – close enough to save space but far enough to be distinct.
Q: Does double sealing affect bag length significantly?
A: In my experience, you lose about 1/2 inch total – negligible for most uses.
Q: Can I double-seal after freezing?
A: Yes, but let the bag warm slightly first for better seal quality.
Key Things to Remember:
- Double sealing isn’t always necessary, but it’s crucial for certain foods
- The extra time investment is minimal compared to potential losses
- Quality bags make a huge difference in success rates
- Clean sealing areas are non-negotiable
- Different foods need different approaches
- Testing seals before storage prevents disappointment
- Regular maintenance of your sealer ensures consistent results
Final Thoughts
Some individuals may argue that sealing your food twice is just being overly careful. When you first get into a vacuum sealing habit, it’s difficult to understand why you should seal the same bag twice.
When vacuum sealing things like meat, it’s essential to ensure that it gets a really nice, tight seal.
Remember, these are guidelines based on my personal experience – feel free to adapt them to your specific needs and equipment. The most important thing is finding what works reliably in your kitchen.
Have you had any interesting experiences with vacuum sealing? I’d love to hear about them! Drop a comment below or reach out with your tips and tricks. Happy sealing!
Hey, I’m Abdul Manan, a vacuum enthusiast with a knack for simplifying cleaning. I love sharing tips, tricks, and insights to help you get the most out of your vacuum. Let’s tackle cleaning the smart way!
