How Do You Take Apart Dyson Vacuum Cleaner
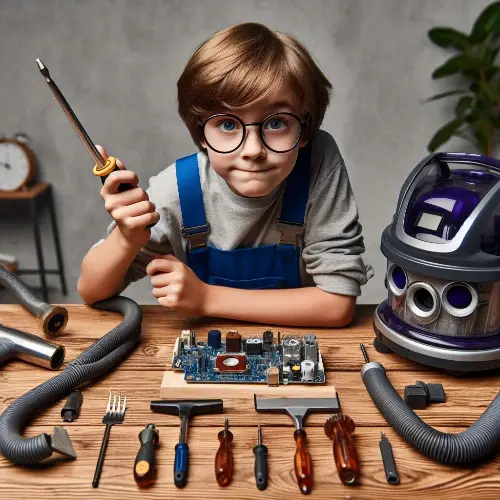
Cleaning and disassembling your Dyson vacuum cleaner is important to maintaining its performance. This comprehensive guide will walk you through the complete disassembly and cleaning process. With some basic tools and time, you can have your Dyson running like new again.
Why Should You Disassemble and Clean Your Dyson?
Regular disassembly and cleaning keeps your Dyson operating at peak efficiency by:
- Removing built-up dust and debris from the internal components
- Cleaning and replacing clogged filters
- Clearing blockages and obstructions
- Resetting internal sensors and software
A clean Dyson will have stronger suction, capture more dust and allergens, and run more reliably over time. Following the manufacturer’s recommendations for maintenance is the best way to extend the life of your vacuum and protect your investment.
What You’ll Need to Disassemble and Clean a Dyson
Before getting started, make sure you have the following tools and supplies handy:
- Phillips and Torx screwdrivers
- Small flathead screwdriver
- Replacement filters (if needed)
- Soft brush or cloth
- Mild soap and water
- Clean towels or rags
You may also want to have your Dyson owner’s manual available for reference. The manual will provide model-specific guidance for disassembly.
Step-by-Step Guide to Disassembling a Dyson
Here is a general overview of the disassembly process for most Dyson vacuum models:
Remove the Wand, Hose, and Accessories
Detach the wand from the vacuum body. Remove the hose and any attachments like brushes, crevice tools, etc. This gives you easy access to the vacuum body.
Open the Dust Bin
Locate the release catch on the dust bin and open it to remove any debris inside. Some models may have a “push” button rather than a release catch.
Remove the Cyclone Assembly
The cyclone assembly can be removed by unscrewing it from the vacuum body, usually with a counterclockwise twist. This exposes the internal filters.
Detach the Filters
Most Dyson vacuums have two filters – a pre-motor filter and a post-motor filter. Carefully remove each filter and set it aside to clean later.
Remove the Brush Bar
You’ll need to detach the brush bar housing for cylinder and upright models to access the brush roller. Remove any screws or clips securing the housing and lift it off.
Detach Remaining Components
Depending on your model, you may need to remove the motor, sensors, circuit board, and other internal parts. Refer to your owner’s manual for step-by-step instructions.
Cleaning and Reassembling the Dyson
Once fully disassembled, here are some tips for cleaning and reassembly:
- Wash filters with water only and allow them to fully dry before reinstalling
- Use a soft brush to remove debris from cyclones, bins, and other parts
- Wipe down components with a dry cloth
- Vacuum the motor to remove built-up dust
- Follow your manual instructions in REVERSE in order to reassemble
- Take care of aligning pieces and tightening screws during reassembly
- Check suction power after reassembling to make sure everything is air-tight
FAQs
How often should I deep clean my Dyson?
Dyson recommends deep cleaning your vacuum every 6 months to 1 year. More frequent use or vacuuming up fine dust may require more frequent disassembly and cleaning.
What parts of a Dyson need cleaning?
Focus cleaning on the filters, bin, cyclone assembly, brush bar, and motor. These areas are most prone to buildup of dust and debris over time
Can I wash the filters?
Yes, Dyson filters can be rinsed with cold water only. Allow them to air dry completely before reinstalling – wet filters can damage the motor if put back too soon.
Do all Dyson models disassemble the same way?
While the general process is similar, the exact disassembly steps can vary by model. Always refer to your owner’s manual for instructions specific to your Dyson.
Why does my Dyson lose suction power over time?
Reduced suction is most often due to accumulated debris and clogged filters. Disassembling and deep cleaning clears blockages and allows proper airflow.
Conclusion
Taking the time to regularly disassemble and deep clean your Dyson vacuum will remove accumulated dirt, unclog passages, and keep the machine working like new.
Refer to your owner’s manual and follow the steps outlined here for a complete cleaning. With proper maintenance, your Dyson will provide many years of strong suction and dependable use.
Hey, I’m Abdul Manan, a vacuum enthusiast with a knack for simplifying cleaning. I love sharing tips, tricks, and insights to help you get the most out of your vacuum. Let’s tackle cleaning the smart way!
